
Capturing images with DirectX
The library that comes with OpenCV is rather limited. It supports only a few models of webcams/cameras. This can be inhibiting if you're trying to work with some high quality camera.
DirectX is a much bigger thing (3D math + 3D audio + 3D graphics + input from joysticks/etc + loads of other things). One of the libraries in DirectX lets you access imaging hardware. And, DirectX supports a HUGE number of cameras. Rather, a huge number of cameras support DirectX.
And we'll be using that to get images into our OpenCV programs.
Gathering dependencies
We won't go into the details about how to use DirectX. That in itself would be another set of posts. So, we'll use a different library, called VideoInput and use that to get the camera data.
You'll need to download quite a bit of stuff for this to work.
First, you need the VideoInput library itself. So, go download the videoinput library and extract the files.
Now because this library uses DirectX, you need some stuff. Here's what all you need
As I write this post, I have these files downloaded:
- 5.2.3790.2075.51.PlatformSDK_Svr2003R2_rtm.img (409 MB)
- dxsdk_feb2005.exe (154MB)
- dxsdk_feb2005_extras.exe (35.6 MB)
- videoInput0.1995.zip (33.7 MB)
Getting things running
- Mount the .img file for the PlatformSDK (using something like PowerISO)
- Install the platform SDK
- Install the DirectX SDK
- The extracted files from the DirectX SDK extras go into the folder where you installed the DirectX SDK (just cut paste the extras folder)
- Extract the VideoInput archive into some folder
With all this done, we're ready to start putting things together. So start Microsoft Visual Studio 2008 (or whatever IDE you use) and follow along.
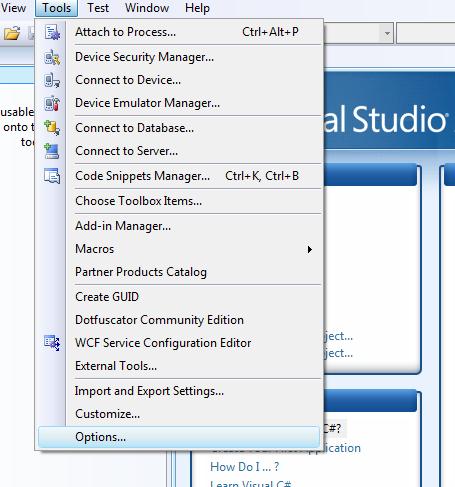
Open up the Options dialog box:
Next, open up the directories tab:

See the "Show directories for" drop down on the top right? For each of those we'll add some files.
Executable Files:
C:\\Program Files\\Microsoft Platform SDK for Windows Server 2003 R2\\Bin
C:\\Program Files\\Microsoft DirectX 9.0 SDK (February 2005)\\Utilities\\Bin\\x86
Include Files:
C:\\videoInput0.1995\\videoInput0.1995\\compiledLib\\compliedByVs2008\\include
C:\\Program Files\\Microsoft Platform SDK for Windows Server 2003 R2\\Include
C:\\Program Files\\Microsoft Platform SDK for Windows Server 2003 R2\\Include\\mfl
C:\\Program Files\\Microsoft Platform SDK for Windows Server 2003 R2\\Include\\atl
C:\\Program Files\\Microsoft DirectX 9.0 SDK (February 2005)\\Include
C:\\Program Files\\Microsoft DirectX 9.0 SDK (February 2005)\\Extras\\DirectShow\\Include
C:\\Program Files\\Microsoft DirectX 9.0 SDK (February 2005)\\Extras\\DirectShow\\Samples\\C++\\DirectShow\\BaseClasses
Library Files:
C:\\videoInput0.1995\\videoInput0.1995\\compiledLib\\compiledByVS2008
C:\\Program Files\\Microsoft Platform SDK for Windows Server 2003 R2\\Lib
C:\\Program Files\\Microsoft Platform SDK for Windows Server 2003 R2\\Samples\\Multimedia\\DirectShow\\BaseClasses\\Debug_Unicode
C:\\Program Files\\Microsoft DirectX 9.0 SDK (February 2005)\\Lib\\x86
C:\\Program Files\\Microsoft DirectX 9.0 SDK (February 2005)\\Extras\\DirectShow\\Lib\\x86
C:\\Program Files\\Microsoft DirectX 9.0 SDK (February 2005)\\Extras\\DirectShow\\Samples\\C++\\DirectShow\\BaseClasses\\Debug_Unicode
With these settings done, we should be able to grab frames from the camera through DirectX.
Building Libraries
The DirectShow SDK is just source code. It comes with pre-built stuff. That would increase filesize. So the good people of Microsoft shifted the burden of building their libraries onto us.
Go here:
C:\\Program Files\\Microsoft DirectX 9.0 SDK (February 2005)\\Extras\\DirectShow\\Samples\\C++\\DirectShow\\BaseClasses\\
You should see a solution file. Open that in Visual Studio. We need to build this solution to get all the files we need. Try building it as it is.
You would probably get some errors. If you get a linker error C2146 for winnt.h or error C4430 in ctlutil.h the problem here is that this member operator function does not have a return type:
operator=(LONG);
Change it to:
COARefTime& operator=(LONG);
If you want, you can read more about it over here.
Next, we need to make sure that it becomes a static library. To do that, Go to: Project Settings -> Librarian -> General and set Additional Dependencies to "dxguid.lib ole32.lib strmiids.lib uuid.lib", without the quotes. And also set Link Library Dependencies to Yes.
If you still get some errors, they're probably about variables not being declared. Maybe a variable named Count, a static variable that needs a type (set its type to int), and iDone. These errors occur mostly because of for loops. So declaring them outside the for loop should be enough.
Once you've successfully built the solution (maybe with lots of warnings... but they don't matter)... we're done.
We now have all files required to capture from DirectX (using the DirectX library).
A sample project
With everything done, I'll show a little demo of how to get frames from the videoinput library.
Create a new Win32 Project. Name it whatever you want, and accept the default settings.
In the main file of the project, we write the following code:
#include "stdafx.h"
#include "videoInput.h"
#include "cv.h"

#include "highgui.h"

int main()
{
    videoInput VI;
    int numDevices = VI.listDevices();
    int device1= 0;
    VI.setupDevice(device1);
    int width = VI.getWidth(device1);
    int height = VI.getHeight(device1);
    IplImage* image= cvCreateImage(cvSize(width, height), 8, 3);
    unsigned char* yourBuffer = new unsigned char[VI.getSize(device1)];
    cvNamedWindow("test");
    while(1)
    {
        VI.getPixels(device1, yourBuffer, false, false);
        image->imageData = (char*)yourBuffer;
        cvConvertImage(image, image, CV_CVTIMG_FLIP);
        cvShowImage("test", image);
        if(cvWaitKey(15)==27) break;

    }

    VI.stopDevice(device1);
    cvDestroyWindow("test");

    cvReleaseImage(&image);

    return 0;

}
Go to Project Properties -> Confuguration Properties -> Linker -> Input and add videoinput.lib along with the usual OpenCV library files.
Then try compiling this code. It should work perfectly and you should see a live video from the first camera the program detects.
If you get errors about some library names atlthunk.lib, you have two options:
- Go to Project Settings -> Linker -> Command Line and Add /NODEFAULTLIB:"atlthunk" Or
- A little hack that works perfectly! Take a random .lib file, and rename it to atlthunk.lib. Place it in one of the Library directories we had added above.
Conclusion
With this, you've got access to all those cameras that you bought, but packed them up because OpenCV didn't "support" them. They should all work now. Enjoy!
Related posts


