
Mathematical Morphology
Basic Operations
Series: Mathematical Morphology:
- Basic Operations
- Composite Operations
I'm sure you've studied morphology in Biology. Well, that was biological morphology. This is mathematical morphology. This was one tool that I always knew about, but never really used it. For some reason, I thought this was only for some funky effects (the name "erode" mislead me). These operations that I'm about to explain are super useful! Hopefully, you'll appreciate what these tools can do!
What is mathematical morphology?
Mathematical morphology is a technique used not only on images, but also on graphs, meshes, and anything else that has a spatial nature to it.
You have two things when working with morphology:
- The image
- The structuring element
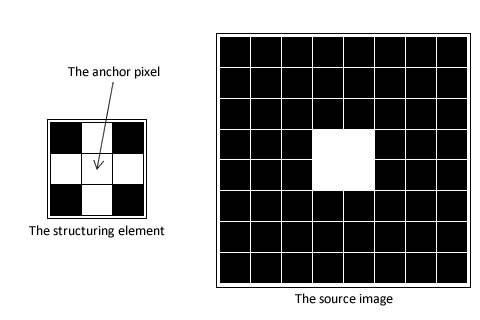
The structuring element is much smaller than the image (sometimes, its 3x3 in size, but can be bigger and rectangular). This structuring element slides over the image and transforms it.
The structuring element creates new pixelsor erases them. Based on this, two basic operations are defined: dilation and erosion.
Dilation
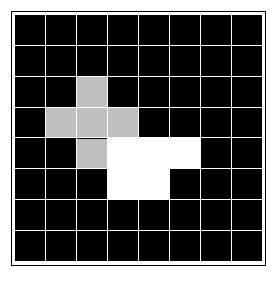
In this operation, new pixels are marked white. The structuring element slides over the source image. Whenever the anchor pixel of the structuring element is at a white pixel in the source, the structuring element "leaves an impression". These pictures should clarify things.
I'll take you through the entire sliding process and we'll see he four pixels in the center dilate.
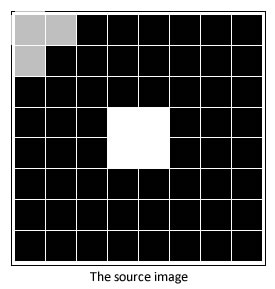
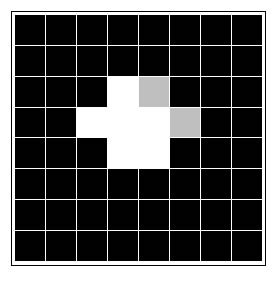
The structuring element starts its sliding thingy from the top left. At the anchor pixel, the color is black. So nothing happens.
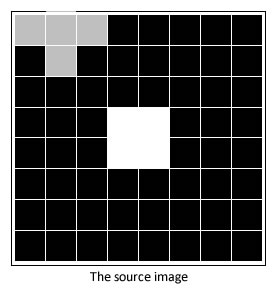
The second position. Again, the color at the anchor pixel is black. So, nothing happens. Now fast forward.
Nothing happens here either. Fast forward again:

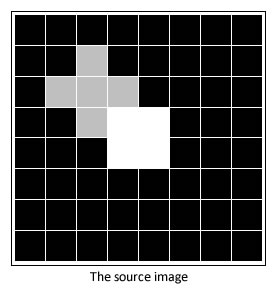
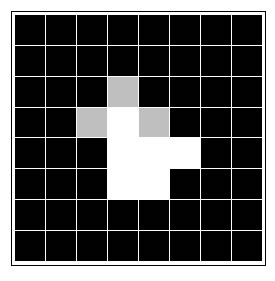
We got some action! The anchor pixel has a white. The structuring element will convert all its pixels into white in the image and move to the next pixel:
Again, a white pixel. So the changes are made:
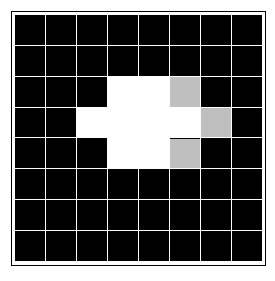
The second change is made. Now we have a situation. The pixel at the anchor point is white here. Should another change be made? If yes, things would get weird. You'd have to create white pixels for everything pixel on the right.
So instead of checking in this intermediate image, only the source image is checked. In the source image, the pixel under the anchor point is black. So no changes are done.
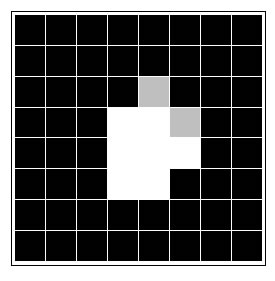
Similarly if we continue the processing, this is the result obtained:
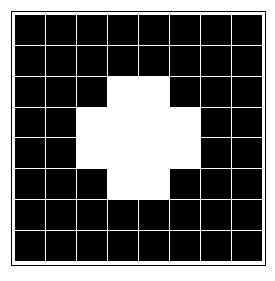
This is the dilation of the source image I showed above.
Erosion
This works in the reverse direction of dilation. Whenever the structuring element is on top of a shape the same as itself, it leaves that point alone. Otherwise sets all pixels in it to black.
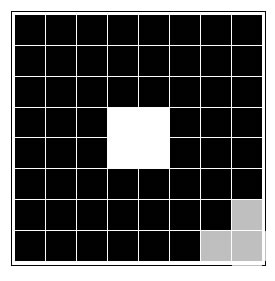
Again, pictures would make things easier. The structuring element is the same cross. And the source image now is the result of the example (the dilated square).
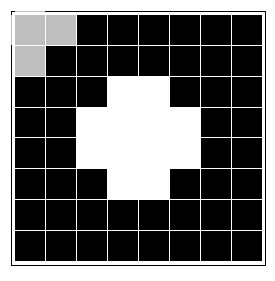
The erosion starts at the top left corner. All pixels that are white in the structuring element are black. So all non-white pixels are marked as black. They're already black, so not much of a difference. Lets fast forward to where it hits the central plus.
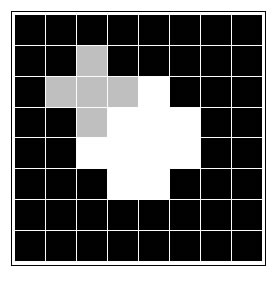
Again, not all non-black pixels of the structuring element are white in the source. So they're all marked black. The element moves foward:
Again, not all expected pixels are white. So they're all marked as black. The procedure continues like this:
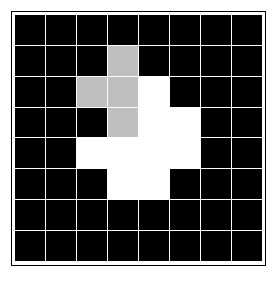
The next step is tricky. Do you clear out some more pixels? Or do you create a white spot? The answer is: you create a white pixel. Why? Because in the source image, there exists a "plus". So the entire structuring element is "present" at this location. So you mark the anchor point as a white.
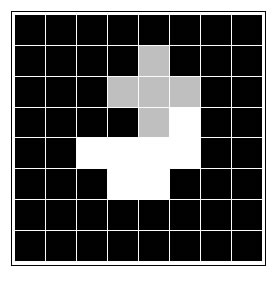
Similarly, for the next pixel:
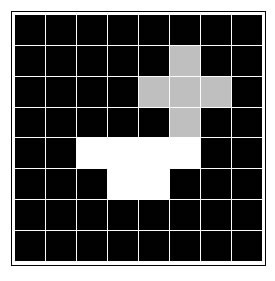
See that little protrusion on the right? That will be erased in the next step. Following these rules, you'll end up with this as your result:
Erosion is NOT the inverse of Dilation
In the above examples, dilating the square produced a plus. And eroding a plus produced a square. This is just by chance. In general, eroding and dilating produces an image different from the original. Here's an example:
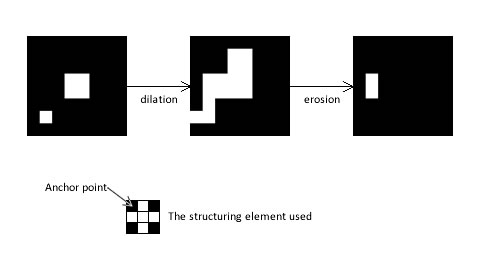
I've added an extra white pixel and changed the anchor point. All the results change drastically.
Not just that, even the order of operations matters. Eroding and dilating is not the same as dilating and eroding. If you're familiar with math, these are not commutative operators. In a sense. Well, ok. No math.
Summary
Dilation creates new white pixels in an image. Erosion deletes white pixels in an image. The creation and deletion depends on structuring element. The element is a lot smaller than the image itself.
In future posts, we'll look at some more advanced stuff. How to make use of this seemingly useless erosion, dilation and structuring elements.
More in the series
This tutorial is part of a series called Mathematical Morphology:
- Basic Operations
- Composite Operations
Related posts


